A Professional’s Guide: How to Store Tarps Properly to Prevent Mold and Mildew

Apr 24 2026
Introduction: Why Proper Tarp Storage Matters More Than You Think
Waterproof tarps are one of the most versatile tools across industries—construction, logistics, agriculture, outdoor recreation, and emergency preparedness. They protect valuable assets from rain, sun, dust, and debris. But here’s the catch: even the toughest tarp can fail prematurely if it’s stored incorrectly.
Mold and mildew are among the most common—and most preventable—causes of tarp degradation. Once they take hold, they can weaken fibers, create persistent odors, stain surfaces, and ultimately shorten the lifespan of the material.
For professionals who rely on tarps daily, proper storage isn’t just about organization—it’s about protecting your investment and ensuring performance when it matters most.A Professional’s Guide: How to Store Tarps Properly to Prevent Mold and Mildew
This guide walks through proven methods to store tarps correctly, prevent mold growth, and maintain long-term durability.

Understanding the Enemy: Mold and Mildew
Before diving into storage techniques, it’s important to understand what you’re up against.
What Causes Mold Growth?
Mold thrives in environments with:
Moisture
Warm temperatures
Limited airflow
Organic material
Even synthetic tarps can develop mold if dirt, pollen, or organic debris are present.
Why Tarps Are Vulnerable
Tarps often get:
Wet from rain or humidity
Dirty from outdoor use
Folded and stored quickly after use
This combination creates the perfect breeding ground for mold spores.
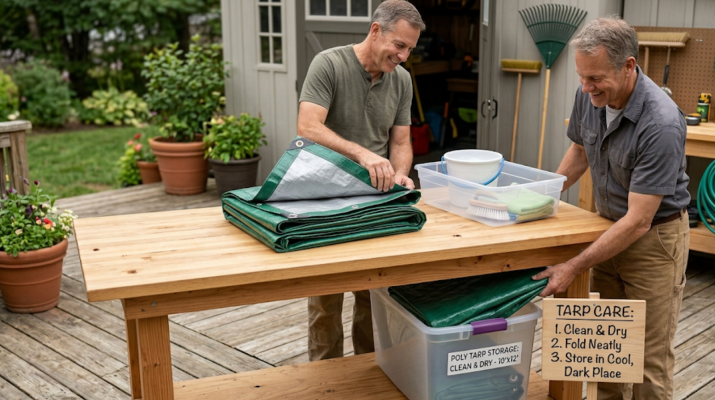
Step 1: Always Dry Your Tarp Completely
If there’s one rule you should never break, it’s this: never store a damp tarp.
Air Drying Is Essential
After use:
Hang the tarp in a well-ventilated area
Spread it out fully to expose all surfaces
Allow both sides to dry completely
Avoid Shortcuts
Do not:
Fold a tarp while it’s still damp
Store it in a sealed container immediately after use
Even slight moisture trapped inside folds can lead to mold within days.
Step 2: Clean Before Storage
Dirt and debris can trap moisture and feed mold growth.
Basic Cleaning Process
Shake off loose dirt
Rinse with clean water
Use mild soap if needed
Gently scrub problem areas
Rinse thoroughly
Avoid Harsh Chemicals
Strong chemicals can:
Damage waterproof coatings
Weaken fibers
Stick to mild detergents unless dealing with heavy contamination.
Step 3: Choose the Right Storage Environment
Where you store your tarp matters just as much as how you store it.
Ideal Conditions
Cool temperatures
Low humidity
Good airflow
Protection from direct sunlight
Avoid These Environments
Damp basements
Sealed plastic bins (without ventilation)
Outdoor exposure
Hot, enclosed spaces like attics
Humidity is your biggest enemy.
Step 4: Fold or Roll—What’s Better?
Both methods work, but each has its advantages.
Folding
Pros:
Saves space
Easier to stack
Cons:
Creates creases where moisture can collect
Rolling
Pros:
Reduces stress on material
Minimizes crease-related wear
Cons:
Takes more storage space
Best Practice
If possible:
Roll large tarps
Fold smaller ones loosely
Avoid tight, compact folds that trap air and moisture.
Step 5: Use Breathable Storage Solutions
The type of container you use plays a critical role.
Recommended Options
Fabric storage bags
Mesh containers
Ventilated shelving
What to Avoid
Airtight plastic bins (unless tarp is 100% dry)
Vacuum-sealed bags
Tarps need to “breathe” to prevent condensation buildup.
Step 6: Elevate Your Tarps
Never store tarps directly on the ground.
Why Elevation Matters
Floors—especially in garages or warehouses—can:
Retain moisture
Transfer dampness to stored items
Solutions
Use pallets
Install shelving
Hang tarps on racks
Even a few inches of elevation can make a big difference.
Step 7: Control Humidity in Storage Areas
If you’re storing tarps long-term, humidity control is critical.
Tools to Use
Dehumidifiers
Moisture absorbers
Ventilation systems
Target Humidity Level
Aim for:
Below 60% relative humidity
Lower is better when it comes to mold prevention.
Step 8: Inspect Regularly
Even properly stored tarps should be checked periodically.
What to Look For
Musty odors
Discoloration
Spots or patches
Inspection Frequency
Monthly for high-use environments
Quarterly for long-term storage
Early detection allows for quick remediation.
Step 9: Handle Mold Immediately
If you spot mold, act fast.
Cleaning Mold from Tarps
Take the tarp outdoors
Brush off loose mold
Wash with mild soap or specialized cleaner
Rinse thoroughly
Dry completely in sunlight if possible
Sunlight as a Natural Disinfectant
UV rays can help kill mold spores, but avoid prolonged exposure to prevent material degradation.
Step 10: Avoid Long-Term Compression
Storing tarps under heavy objects can:
Trap moisture
Deform material
Reduce airflow
Always store tarps in a way that allows air circulation.
Material-Specific Storage Tips
Different tarp materials require slightly different care.
Polyethylene (Poly) Tarps
Lightweight and waterproof
More prone to mold if dirty
Tip: Clean thoroughly before storage.
Canvas Tarps
Breathable but more susceptible to mold
Tip: Ensure complete drying and use low-humidity storage.
Vinyl Tarps
Highly durable and water-resistant
Tip: Focus on cleanliness and airflow.
Common Mistakes to Avoid
Storing While Dirty
Debris holds moisture and encourages mold growth.
Ignoring Small Damp Areas
Even a slightly damp corner can spread mold throughout the tarp.
Using Non-Breathable Containers
Sealed environments trap humidity.
Skipping Inspections
Out of sight shouldn’t mean out of mind.
Professional Storage Setup Example
A well-organized tarp storage system might include:
Wall-mounted racks for hanging tarps
Shelving units with airflow gaps
Dehumidifier maintaining stable humidity
Clearly labeled storage bags
This setup ensures accessibility, organization, and long-term protection.
The Cost of Improper Storage
Neglecting proper storage can lead to:
Reduced tarp lifespan
Increased replacement costs
Compromised waterproof performance
Unpleasant odors
For businesses, this translates directly into higher operational costs.
Long-Term Storage vs. Short-Term Storage
Short-Term (Days to Weeks)
Focus on drying
Basic folding or rolling
Long-Term (Months to Years)
Full cleaning
Controlled environment
Regular inspections
Environmental Factors to Consider
Humid Climates
Increase ventilation
Use dehumidifiers aggressively
Cold Climates
Avoid freezing moisture inside folds
Coastal Areas
Watch for salt buildup
Clean more frequently
Future Innovations in Tarp Storage
As materials evolve, so do storage solutions.
Expect to see:
Mold-resistant coatings
Smart storage systems with humidity sensors
Advanced breathable storage materials
These innovations will make tarp maintenance even more efficient.
Conclusion: Protect Your Tarps, Protect Your Investment
Tarps are built to withstand tough conditions—but they’re not immune to poor storage practices. Mold and mildew can quietly destroy even the highest-quality materials if proper precautions aren’t taken.
By following a few key principles:
Always dry thoroughly
Clean before storing
Choose breathable environments
Control humidity
Inspect regularly
you can dramatically extend the life of your tarps and ensure they’re ready when you need them.
In professional settings, small maintenance habits lead to big savings. Proper tarp storage isn’t complicated—but it does require consistency and attention to detail.
Treat your tarps like the valuable tools they are, and they’ll continue to perform reliably for years to come.
Related Products