Hammock Camping Under a Tarp: A Beginner’s Guide to Staying Dry in the Rain

May 08 2026
Hammock camping has exploded in popularity over the last few years, especially among hikers, backpackers, overlanders, and outdoor enthusiasts looking for lighter, more flexible shelter systems. Sleeping suspended between trees offers a unique combination of comfort, airflow, portability, and connection to nature that traditional tents often cannot match.
But for beginners, one challenge creates the most anxiety:
Rain.
The idea of hanging in a hammock during a storm sounds risky to many first-time campers. Questions immediately come to mind:
What if water leaks through the tarp?
What if rain runs down the suspension straps?
How do you stay warm when everything gets wet?
Is hammock camping even practical in bad weather?
The truth is that hammock camping in rain can actually be incredibly comfortable—sometimes even more comfortable than tent camping—if your setup is built correctly. The key is understanding how water behaves in outdoor environments and learning how tarp positioning, suspension systems, airflow, and campsite selection all work together.
This beginner’s guide breaks down the essential principles of rain protection for hammock camping so you can stay dry, warm, and confident even when the weather turns ugly.
1. Why Rain Feels More Intimidating in Hammock Camping
Tent campers are psychologically reassured by enclosure.
A tent creates:
Walls
A floor
A roof
A feeling of separation from weather
Hammock camping feels more exposed because:
You are elevated off the ground
The shelter is open-sided
Wind and rain appear closer
The setup looks minimalist
But this exposure is partly an illusion.
In many situations, hammock systems actually outperform tents during wet weather because:
You avoid ground flooding
Mud becomes irrelevant
Drainage concerns decrease
Ventilation improves
The secret lies in tarp setup.
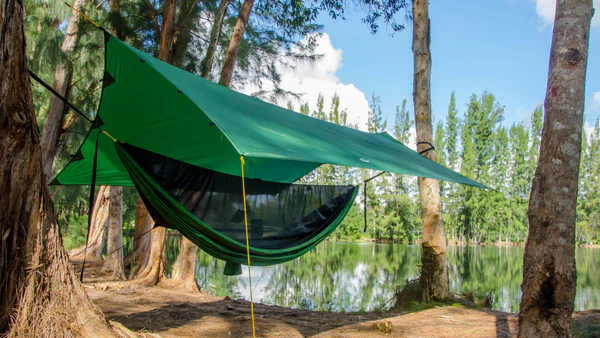
2. Understanding the Role of the Tarp
The tarp is the true shelter in hammock camping.
The hammock itself is simply the sleeping platform.
Beginners often underestimate the tarp, but experienced hammock campers know:
Your tarp determines your weather protection quality.
A properly configured tarp:
Redirects rainfall
Blocks wind
Reduces condensation
Creates dry working space
Protects gear
3. Choosing the Right Tarp Shape
Not all tarps provide equal rain protection.
Understanding tarp geometry is critical.
Flat Tarps
Flat tarps are:
Lightweight
Flexible
Minimalist
Advantages:
Multiple pitching configurations
Lightweight backpacking option
Disadvantages:
Require more skill
Less storm protection for beginners
Best for:
Experienced users
Mild weather conditions
Hex Tarps
Hexagonal tarps are one of the most popular hammock camping options.
Advantages:
Better side coverage
Easier setup
Good balance between weight and protection
Disadvantages:
Slightly less flexible than flat tarps
Best for:
Most beginner and intermediate hammock campers
Winter or Full-Coverage Tarps
These include:
Doors
Extended side panels
Storm flaps
Advantages:
Excellent rain and wind protection
Superior cold-weather performance
Disadvantages:
Heavier
More expensive
Reduced airflow
Best for:
Heavy rain
Cold climates
Long-term camping
4. Tarp Size Matters More Than Most Beginners Realize
One of the biggest beginner mistakes is choosing a tarp that is too small.
A small tarp may work in perfect weather but fail during:
Wind-driven rain
Overnight storms
Heavy downpours
General beginner rule
Longer and wider tarps provide:
Better rain coverage
More setup forgiveness
More protected gear storage
For beginners, slightly oversized tarps are often the safest choice.
5. Understanding Rain Direction and Wind Exposure
Rain rarely falls straight downward in real outdoor conditions.
Wind changes everything.
Strong wind can:
Push rain sideways
Blow water under the tarp
Create exposed hammock ends
This is why tarp orientation matters.
Best tarp orientation strategy
Position the tarp:
Parallel to prevailing wind direction
Lower on the windward side
Tight enough to reduce flapping
A low storm pitch dramatically improves weather protection.
6. The Importance of Proper Ridgeline Setup
The ridgeline is the structural backbone of your tarp system.
A poor ridgeline setup creates:
Sagging tarp sections
Water pooling
Reduced rain runoff
Tight ridgeline principles
Your tarp ridgeline should:
Maintain consistent tension
Promote rapid water shedding
Prevent low water collection points
Water always follows gravity.
Good tarp setup controls where water travels.
7. Why Water Runs Down Hammock Straps
One of the most frustrating beginner problems is waking up to water inside the hammock despite good tarp coverage.
Usually, the culprit is strap runoff.
Rainwater travels:
Down tree straps
Along suspension lines
Directly into the hammock body
The solution: drip lines
Drip lines interrupt water flow.
Simple methods include:
Small cords tied below suspension
Carabiner interruptions
Fabric drip points
These force water to drip harmlessly to the ground before reaching the hammock.
8. Site Selection: Your First Layer of Rain Protection
Even the best tarp cannot compensate for terrible campsite selection.
Good hammock campsite characteristics
Natural wind protection
Use:
Tree clusters
Terrain barriers
Dense forest cover
to reduce wind exposure.
Avoid exposed ridges
High ridges experience:
Stronger wind
Colder conditions
More aggressive rain exposure
Watch for widowmakers
Never hang beneath:
Dead branches
Unstable trees
Storm-damaged limbs
Safety always comes first.
9. Tree Selection Matters More Than Beginners Think
Strong tarp performance depends on stable anchor points.
Ideal hammock trees
Choose trees that are:
Healthy
Thick enough for secure support
Properly spaced
Structurally stable
Avoid:
Rotten trees
Thin saplings
Loose bark species
Proper tree spacing
Most hammock setups work best with:
Moderate distance between anchors
Balanced suspension angles
Too much distance creates excessive tension and poor tarp geometry.
10. Understanding Tarp Pitch Height
The height of your tarp changes protection dramatically.
High tarp pitch
Advantages:
Better airflow
More visibility
Easier movement underneath
Disadvantages:
Reduced storm protection
Low tarp pitch
Advantages:
Superior rain resistance
Better wind blocking
Reduced splash exposure
Disadvantages:
Less ventilation
Tighter working space
Beginner recommendation
In uncertain weather:
Pitch lower than you think you need.
You can always raise it later.
11. Condensation: The Hidden Moisture Problem
Many beginners mistake condensation for rain leakage.
Condensation forms when:
Warm moist air contacts cooler surfaces
Ventilation becomes restricted
Why hammock systems often reduce condensation
Compared to tents:
Hammocks allow better airflow
Elevated sleeping improves ventilation
Open tarp systems reduce trapped humidity
But condensation still happens when:
Tarps are pitched too low without airflow
Weather is humid
Ventilation is blocked completely
Balance matters.
12. Staying Warm in Rainy Conditions
Rain often creates cold stress faster than expected.
The biggest beginner mistake
Relying only on sleeping bags.
In hammocks, compressed insulation beneath your body loses effectiveness due to air circulation below.
The underquilt solution
An underquilt hangs beneath the hammock and preserves insulation loft.
Advantages:
Prevents cold air exposure
Improves rainy weather comfort dramatically
Reduces heat loss
Budget beginner alternative
Closed-cell foam pads can also work but may shift during sleep.
13. Gear Management Under the Tarp
Rain protection is not just about the sleeper—it is about protecting all equipment.
Common beginner mistake
Leaving backpacks exposed outside tarp coverage.
Smart gear strategies
Store gear beneath hammock
Many campers place packs:
On ground cloths
Under suspended hammocks
Inside waterproof covers
Use gear slings
Some hammock systems include:
Under-hammock storage organizers
Hanging gear shelves
This keeps equipment dry and accessible.
14. Tarp Materials: What Beginners Should Know
Tarp fabric affects:
Weight
durability
waterproof performance
cost
Common tarp materials
Polyester
Advantages:
Stable in rain
Affordable
Lower stretch when wet
Nylon
Advantages:
Lightweight
Strong
Disadvantages:
May sag when wet
Dyneema Composite Fabric (DCF)
Advantages:
Extremely lightweight
Minimal water absorption
Disadvantages:
Expensive
Popular among ultralight backpackers.
15. Waterproof Ratings and Real-World Performance
Many beginners obsess over waterproof ratings without understanding real-world use.
Higher waterproof ratings generally improve rain resistance, but setup quality matters just as much.
A poorly pitched premium tarp may fail faster than a properly pitched budget tarp.
Important factors include:
Seam sealing
Fabric tension
Wind orientation
Coverage geometry
Design and technique matter together.
16. Wind-Driven Rain: The Real Storm Challenge
Most tarp failures happen not from vertical rain, but sideways rain.
Storm protection strategies
Lower tarp sides
Reduce exposed openings.
Use tarp doors
Storm doors close end gaps during severe weather.
Angle tarp intelligently
Face narrower tarp ends toward wind direction.
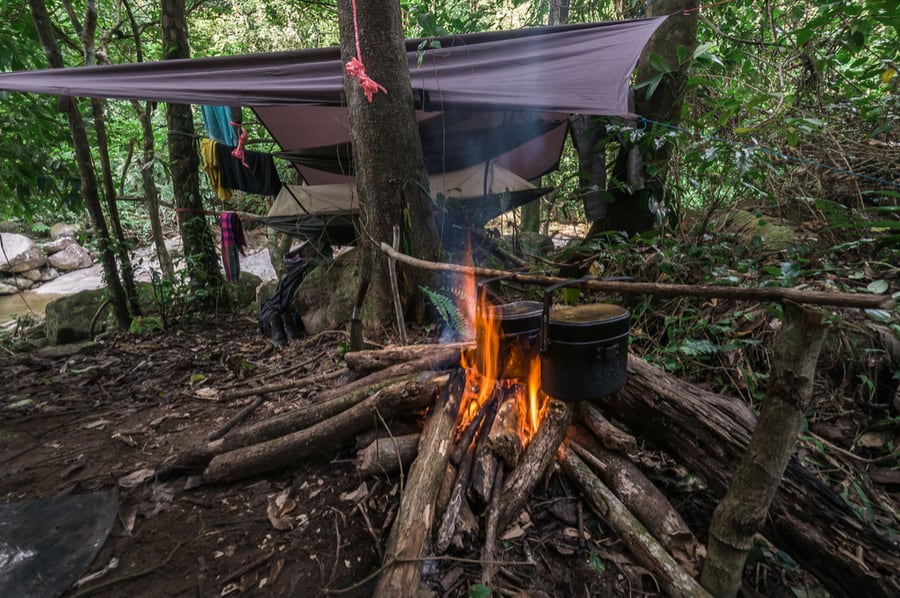
17. Cooking and Camp Life in Rain
One advantage of hammock tarp systems is the ability to create sheltered living space.
Safe tarp camping practices
Many campers:
Cook near tarp edges
Organize gear underneath
Wait out storms comfortably
Important safety warning
Never use open flames inside enclosed tarp spaces due to:
Fire risk
Carbon monoxide danger
Ventilation is critical.
18. Practice Before Real Storm Conditions
Many beginners test hammock camping for the first time during trips.
This increases stress dramatically.
Better approach
Practice:
Backyard setups
Dry-weather pitching
Storm configurations
before depending on the system outdoors.
Confidence comes from repetition.
19. Common Beginner Mistakes in Rainy Hammock Camping
Mistake 1: Tarp too small
Insufficient coverage causes splash exposure.
Mistake 2: No drip lines
Water enters through suspension systems.
Mistake 3: Pitching tarp too high
Increases wind-driven rain vulnerability.
Mistake 4: Ignoring under insulation
Cold air exposure ruins sleep quality.
Mistake 5: Poor campsite orientation
Wind exposure overwhelms tarp protection.
20. Why Many Campers Eventually Prefer Hammocks in Wet Weather
Surprisingly, experienced outdoor campers often prefer hammock systems over tents in rainy environments.
Why?
Because hammock systems:
Stay above mud
Avoid ground flooding
Improve airflow
Create versatile shelter spaces
Reduce condensation
Once properly learned, rainy hammock camping can become extremely comfortable.
Conclusion: Rain Protection Is About System Design, Not Just Waterproof Fabric
Successful hammock camping in rain is not determined by a single piece of gear.
It depends on how multiple elements work together:
Tarp geometry
Ridgeline tension
Suspension management
Wind orientation
Campsite selection
Insulation strategy
A well-designed hammock setup transforms rain from a survival problem into simply another part of the outdoor experience.
For beginners, the most important lesson is this:
You do not need perfect weather to enjoy hammock camping. You need a shelter system that understands how water, wind, airflow, and gravity behave in the real world.
Once you learn those principles, rainy nights in the forest often become some of the most peaceful and memorable camping experiences you will ever have.
Related Products